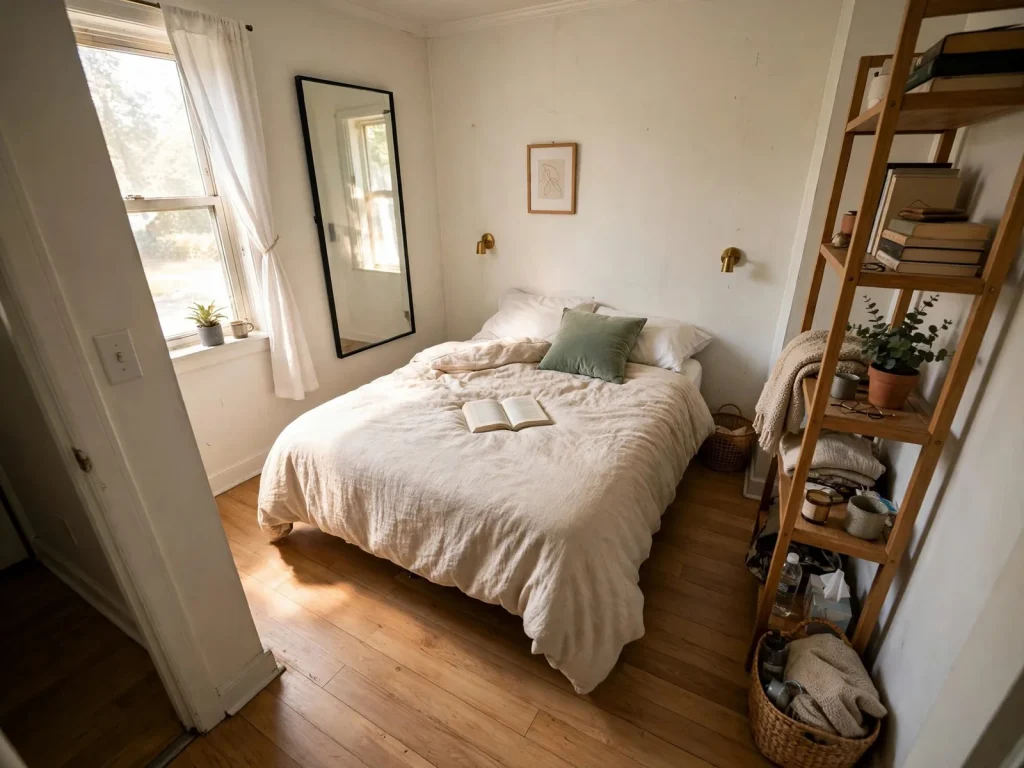
A budget bedroom makeover works in a fixed order: clear and clean first, paint second, textiles third, lighting fourth, styling last. Paint gives the largest change per dollar, bedding is the largest visible surface after walls and buying decor before paint wastes money because half of it will not survive the new palette.
Bedroom makeovers fail in a predictable way. The bedding gets bought first because it is fun, the paint color gets chosen to match it, the lamps arrive in the wrong metal, the budget dies on cushions and six weeks later the room is a pile of nice objects that do not agree with each other. The room did not need more money. It needed an order.
This guide is the order, run as a project across four weekends with the shopping done between them. Five steps: clear and measure, paint, textiles, lighting, style. Each step carries its cost band and its time and nothing is bought before the step that decides it. The totals are stated up front, because a plan that will not name its price is a mood board: the essentials version of this plan runs about $250, the full version about $500 and the version with one real furniture piece about $900. The wider world of budget rooms lives in our budget decor hub; the idea bank behind the styling step is the bedroom ideas pillar.
The plan at a glance: four weekends
Weekend 1: Clear, measure and paint (Steps 1 and 2). Saturday is subtraction and preparation; Sunday is paint, two coats and the room sleeps in its new color by Sunday night if you start early.
Weekend 2: Textiles (Step 3). The bedding, curtains and the rug decision, bought during the week against the finished paint, installed in one morning.
Weekend 3: Lighting and furniture fixes (Step 4, plus repairs). Lamps, bulbs, dimmers and the small furniture repairs (tightened frames, new hardware) that the new room exposes.
Weekend 4: Style and snag (Step 5). Art, objects, plants, the doorway photograph, the edit and the short snag list of what still is not right, which becomes next season’s plan.
Between weekends, the room is livable at every stage. That is deliberate: a plan that leaves you sleeping in a building site for a month gets abandoned by week two.

Step 1: Clear and measure: the honest starting point
Time: half a day. Cost: $0 to $20 (bags, bins, cleaning supplies).
Empty the room’s surfaces and sort everything into keep here, belongs elsewhere and leaves the house. Be honest in a way you are not in March: the chair that holds clothes is not seating, it is a storage failure with legs. Bag the leaving pile and remove it from the house the same day; a donation bag that lives in the corner for a month is clutter with a story.
Then measure and write down the numbers every later step spends money against: room dimensions, ceiling height, bed size, the bed wall’s width, window width and height and the rug footprint (bed width plus 48 to 72 inches). Photograph the room from the doorway, in daylight and lamplight. This is your before picture and it is also the audit: look at it and name the room’s three real problems in order. Most rooms have the same three (light, walls, bedding) in some order, but yours may not and the plan spends money in your order, not the internet’s.
Finally, shop your own house. Walk every other room with the audit in hand and claim what the bedroom needs more: a lamp, a throw, a plant, a frame, a basket. In most homes this step finds $50 to $100 of the plan before a dollar is spent.
Do not buy anything in Step 1. The list you write tonight gets priced during the week and half of it will be edited by Step 2’s paint decision. That restraint is the entire difference between a plan and a spree.

Step 2: Paint: the biggest change per dollar
Time: one day for one wall, a weekend for the full room. Cost: $60 to $180.
Walls are the largest surface in the room and the cheapest to change per square foot, which is why paint goes second and why everything after it is chosen against the finished color, never before. Choose the color from something staying in the room (a rug, a quilt, a piece of art you love) and take the wall one or two shades deeper or quieter than feels safe; walls dry slightly less vivid and rooms forgive depth better than they forgive a color that apologizes.
The decision inside the step: one wall or all four. One wall (the bed wall) is the budget move and the renter-with-permission move: a gallon, an afternoon, done. All four walls is the transformation move and costs roughly two gallons and a full weekend with drying time between coats. Either way, matte or eggshell, two coats and the sample tested on a board in evening light before the tin is opened (the full testing protocol is in our bedroom color ideas page).
Paint while the room is still cleared from Step 1: drop cloth down, furniture centered and covered, edges taped. Clean the walls first (a degreasing wash; bedroom walls hold more dust and skin oil than you think) or the new paint’s first year is spent quietly failing to stick.
Renters without permission: this step becomes the textile wall (a fabric panel or peel-and-stick on the bed wall) and the rest of the plan is unchanged. The sequence does not care which surface changes; it cares that the palette is fixed before money moves.
A note on drying time, because it runs the weekend. Coat one goes on Saturday after the room is cleared. Coat two can follow in as little as two to four hours with most modern paints, but the room should not be slept in with furniture pushed back until Sunday. Paint in the morning if you can. Sleep is a deadline too and it does not negotiate.

Step 3: Textiles: bedding, curtains and the rug decision
Time: one morning to install, one week of shopping before it. Cost: $120 to $350.
Textiles are the second-largest surfaces in the room and this is the step the budget feels most, so it gets the whole of Weekend 2 and a week of deliberate shopping rather than a spree. Buy in this order inside the step:
Bedding first ($80 to $200 for a set that will last): the duvet or quilt in the palette’s main textile color, sheets you like the feel of and shams if the set lacks them. Bedding is the largest single visible object after the walls and it is bought against finished paint, which is why it works. Add the folded throw at the foot in the accent color; that throw is also the palette’s test piece if you are still unsure about the accent.
Curtains second ($40 to $100): hung high and wide (rod 4 to 6 inches above the frame, panels to the floor), in the palette’s quieter tone. If the old curtains still work in the new palette, wash them, rehang them higher and spend the money on the rug instead. The plan rewards honesty about what already works.
The rug decision last and it is a decision: a correctly sized rug (8 by 10 for a queen) is the best $120 to $200 in the whole plan if the floor is bare and a waste of all of it if the room already has carpet or a rug that fits. If the budget forces a choice between the full textile step and the rug, take the bedding and curtains now and put the rug at the top of next season’s list; a small wrong rug bought to fill the gap is the one purchase this plan forbids.

Step 4: Lighting: fix the one harsh light
Time: two hours. Cost: $40 to $120.
Most bedrooms are lit by one ceiling fixture with the wrong bulb and the whole makeover can be betrayed nightly by that single fact. This step builds the three layers in their cheapest effective form: bedside lamps with warm 2700K bulbs (thrifted lamps with new shades are the budget’s best friend, roughly $25 to $50 the pair), the ceiling bulb swapped to 2700K whether it is used nightly or not and one low glow for the last hour (a small dresser lamp, a flameless candle cluster, a plug-in dimmer on the main lamp).
Do the furniture fixes in the same weekend, while the room is in project mode: tighten the bed frame’s bolts (the squeak you have been ignoring is four minutes with a wrench), swap the dresser hardware if it fights the new palette ($15 to $30 and a screwdriver) and raise or shim the nightstand that sits two inches low. New rooms expose old annoyances; fix them while you still have momentum.
Judge the step at night, from the bed, lamps only. If the room finally looks like the photographs you saved, the makeover is structurally done. Everything after this is taste.
One more check before you call the step done: the morning test. Wake up in the new light. Bedrooms are judged twice a day, at the winding down and at the waking up and a lighting scheme that only works at one end of the night is half a scheme. Warm and low usually passes both. If the morning feels dim, the answer is the curtains and the window, not a brighter bulb.

Step 5: Style and finish: the last 10 percent
Time: one morning and it should be enjoyable. Cost: $30 to $100, mostly frames and plants.
Art goes up now, against finished walls, over finished bedding: one large piece above the bed at two-thirds of its width, center near 57 inches. Objects go on surfaces under the one-or-two rule, with a tray to hold the daily things. A plant takes the room’s deadest corner. The mirror, if there is one, goes where it catches the window.
Then the two exercises that separate finished rooms from decorated ones. The doorway photograph: shoot the room from the door, daylight and evening and fix what the camera complains about (it will find a cord, a crooked frame and one object too many; it always does). The edit: remove one thing from the room entirely. Every styled room you admire was edited; most unstylish ones were only accumulated.
End by writing the snag list: the things still wrong that money or time did not reach (the ceiling color, the closet doors, the good rug deferred in Step 3). A snag list is not a failure. It is next season’s Step 1, already written and it stops you impulse-buying against a finished room in the meantime.

The money, totalled honestly
The essentials path, about $250: paint for one wall ($60 to $80 with supplies), a bedding set on sale ($100 to $130), bulbs and one thrifted lamp pair ($40), frames and a plant with what remains. The full plan, about $500: the room painted, bedding and curtains new, the lighting layer complete, hardware swapped, styling bought where the house could not supply it. The furniture path, about $900: the full plan plus one real piece (a headboard, a proper rug, or a secondhand dresser worth keeping), bought once at the end, when the room can tell you which piece it actually needs.
Renters run the same totals with the paint line replaced by peel-and-stick or fabric (roughly the same money) and the hardware line deleted. If your total must be under $150, run Steps 1, 2 (one wall) and 4 (bulbs only) and the free parts of 5; that is a genuine makeover at the price of a dinner out and the bedroom on a budget page is built entirely around that tighter number.
Mistakes that undo the plan
Ranked by how often they waste real money:
- Shopping before Step 1. Every purchase made before the audit and the paint decision is a guess and makeovers die of a dozen small guesses.
- Choosing paint to match new bedding. The order is walls, then textiles, always; bedding chosen first forces the palette and usually forces a repaint.
- The small rug bought to fill the gap. The plan’s one forbidden purchase. A bare floor beats a floating rug and the right rug is a legitimate next-season item.
- Skipping the lighting step because the room “looks fine in daylight”. Makeovers are judged at 9pm by the people who live in them. Bulbs are $15; there is no excuse tier below that.
- Styling before the snag list. Buying decor for a room whose frame squeaks and whose nightstand wobbles spends the finish money on camouflage.
- Declaring it done in Weekend 2. Textiles without light and styling read as new bedding in an old room, which is exactly what they are. The plan is four weekends because the last two are where “finished” lives.
Questions people ask about this
What should I do first in a bedroom makeover? Clear, clean and measure, before any shopping. The audit tells you the room’s three real problems in order, the measurements price every later step and the house itself usually donates a lamp, a throw or a plant to the cause. Every makeover that starts in a store starts with guesses; every one that starts with a tape measure starts with facts.
How much does a budget bedroom makeover cost? About $250 for the essentials version (one wall painted, a bedding set, bulbs and thrifted lamps), about $500 for the full four-weekend plan and about $900 if one real furniture piece joins at the end. The sequence matters more than the total: the same $500 spent out of order buys a visibly worse room.
What gives the biggest change for the least money in a bedroom? Paint, by a distance: $60 to $80 changes every square foot of wall, which is most of what the eye sees. Second is the bulb swap (about $15) because it changes how every color in the room reads each evening. Bedding is the biggest change that costs real money, which is why it comes third in the order, not first.
How long does a bedroom makeover take? Four weekends of part-time work in this plan, with the room livable throughout: one for clearing and paint, one for textiles, one for lighting and fixes, one for styling. Compressed, the same work fits a long weekend for a small room, but the shopping between steps (which is where the money is saved) needs the weekdays, so the four-weekend pace is the budget’s friend.
The bottom line
A makeover is an order, not a haul: clear, paint, textiles, light, style and the discipline to buy nothing before its step arrives. Run in that sequence, $250 changes a room and $500 finishes one. This weekend is Weekend 1: empty the surfaces, write the three problems down and take the before photograph. The plan does the rest, one weekend at a time.