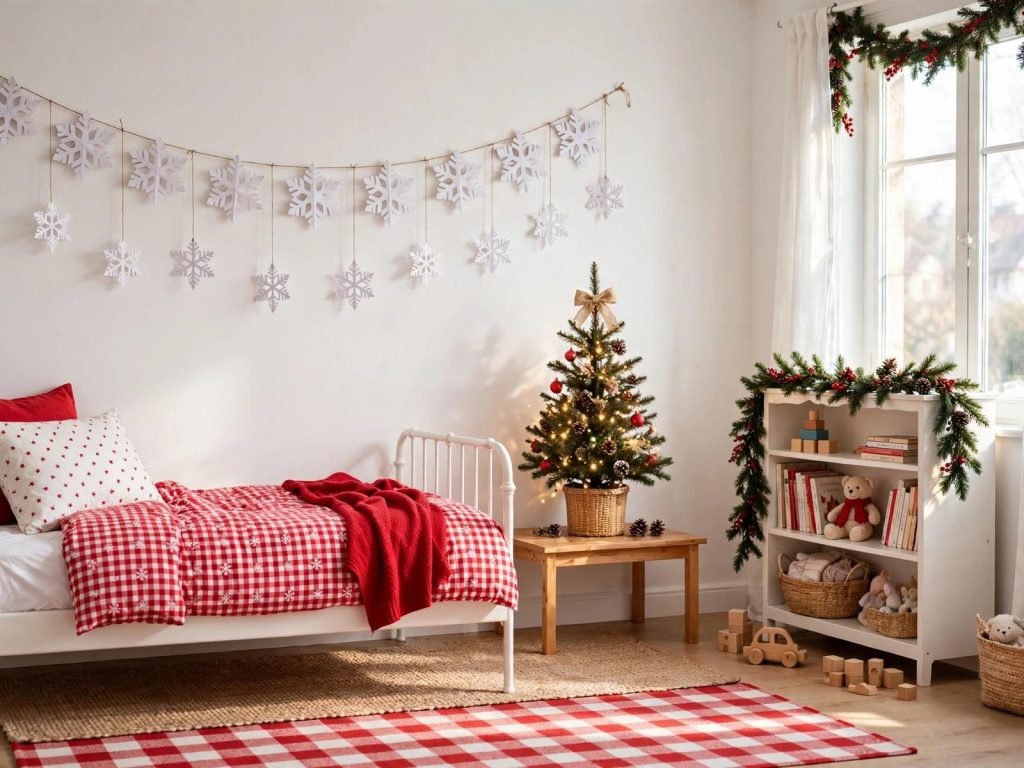
Your bedroom has one light, it hangs in the middle of the ceiling and it is the wrong light for everything that happens in the room after 7pm. It flattens faces, glares at pillow height, turns paint colors into their daytime strangers and makes a room you otherwise like feel like a place you pass through rather than the place you end the day. Almost every bedroom photograph you have ever saved is lit by lamps at sitting height. Almost every real bedroom is lit from the ceiling. That gap is not taste. It is wiring habit.
The fix is a system, not a fixture: three layers of light (ambient, task, accent), every bulb at 2700K and something you can dim. This page gives you 16 ideas inside that system, with the heights, the bulb numbers and the costs that lighting advice usually leaves out. It is the pillar of our lighting section, it is the machinery behind our moody bedroom ideas page and none of it requires an electrician until you decide it does.
Before you start: the three numbers of bedroom light
2700K. Color temperature, printed on every bulb box. It is the warm white of old incandescent bulbs and candlelit rooms and it is the only temperature a bedroom should run after dark. 3000K is the acceptable ceiling-warmer edge; 4000K and above is office light and it will make your skin, your paint and your partner look tired simultaneously.
Lumens, not watts. Brightness is measured in lumens now. A bedside reading lamp wants a bulb of roughly 450 to 800 lumens; a room’s ambient layer wants, in total, about 10 to 20 lumens per square foot, which for a 150-square-foot bedroom is 1,500 to 3,000 lumens spread across sources, emphatically not from one bulb in the middle of the ceiling.
Layers, counted. A finished bedroom has light at three heights doing three jobs. If you count your sources and the answer is one, the ideas below are not decoration; they are the missing infrastructure.
Measure: your nightstand height and your mattress-top height. Lamp sizing in idea 6 is arithmetic done with those two numbers.

Layer one: ambient light that flatters
1. Shade the ceiling light, or swap the fixture for one that glows instead of glares
The ceiling light has a legitimate job (cleaning, dressing on dark mornings, finding the thing you dropped) and it should keep the job and lose the glare. A fabric drum, an opal glass shade or a paper lantern diffuser turns a bare bulb’s hard light into a soft wash. If the fixture itself is a naked bulb in a porcelain holder, replacing the whole fitting with a shaded flush-mount or pendant is the single most visible fixture change in the room.
Hang pendants with the room’s height in mind: in a standard 8-foot ceiling, a semi-flush or short-drop pendant keeps heads safe and light soft. Low ceilings want flush mounts; drama wants ceiling height to pay for it.
Budget: a shade alone runs $15 to $40; a new shaded fitting $60 to $200. Needs drilling: a fitting swap is an electrician’s job in many jurisdictions; a shade is not.
Ceiling height referees the choice. Under 8 feet, flush and semi-flush fittings keep the room’s air; at 9 feet and above, a pendant with a real drop gives the ceiling a reason to exist and puts the ambient source closer to the life of the room. Vaulted ceilings forgive drama but demand scale; a small pendant in a tall room reads as a mistake with a cord. When in doubt, bigger and softer beats smaller and brighter, in every layer on this page.

2. Bounce the ambient light off the ceiling instead of aiming it at your eyes
An uplight (a torchiere floor lamp, an upturned shade, a strip hidden on top of a wardrobe or a pelmet) throws light at the ceiling and lets the room have the reflection: even, shadowless, flattering. It is how hotels make small rooms feel serene and it is the ambient layer least likely to glare at a person lying in bed, because the source itself is invisible from the pillow.
One strong uplight can carry a small bedroom’s whole ambient layer. Place it in the corner the eye sees least and let the ceiling do the distribution work it has been waiting for.
Budget: a basic uplight floor lamp runs $40 to $90. Renter-friendly: entirely; it plugs in and leaves with you.
Where it fails: behind a curtain (a fire-risk and a wasted glow), in a traffic path where it will be knocked monthly and with a cool bulb, which turns the bounce into interrogation-by-reflection. Also give it the room’s best bulb, not its leftover: the uplight often carries the whole ambient layer, so its temperature and its dimmability are the room’s temperature and dimmability after dark.

3. Wash the walls with a pair of sconces
Sconces that throw light up, down or both wash the wall with a gradient that makes the room feel taller and the wall feel finished and they do it without taking a square inch of floor or nightstand. A pair flanking a dresser or a mirror is the classic placement outside the bed wall; flanking the bed is idea 7’s job.
Shaded sconces flatter; exposed-bulb sconces sparkle and glare in equal measure. In a bedroom, choose the shade, or choose a bulb with a frosted finish and half the lumens you first reach for.
Measure: sconce centers at 60 to 66 inches from the floor put the glow at standing eye level without shining into it.

4. Put the ceiling circuit on a dimmer and demote it gracefully
A dimmer turns the ceiling light from an interrogation into a utility: full for cleaning, low for everything else and no longer the room’s villain. If you change nothing else in this layer, change this. Modern LED bulbs need LED-rated dimmers (the buzzing and flicker of the wrong pairing is a compatibility fact, not a defect), so the bulb and the dimmer get bought as a pair.
Renters cannot usually touch the switch and their equivalent is real: dimmable smart bulbs in the ceiling fitting, controlled from the phone, do the same job with no wiring at all.
Budget: a dimmer switch fitted runs $50 to $150 with an electrician; smart bulbs $10 to $15 each do it tonight.

5. Treat daylight as a layer too: sheers for the day, blackout for the night
The room’s biggest light source is the window and most bedrooms manage it with one curtain doing two incompatible jobs. A sheer layer diffuses daytime glare into soft ambient light (and saves pale paint and textiles from looking washed at noon); a blackout layer delivers the darkness sleep actually wants. The pair, on a double rod or a rod plus tension rod, is the complete daylight system.
The full curtain method (heights, widths, fabrics) is our bedroom curtain ideas page. Here it earns its place because every evening scheme in this page assumes the window can go properly dark when asked.
Budget: sheers are the cheapest layer in the entire lighting system, from about $10 a panel.
Orientation writes the details. East rooms get the sunrise whether they ordered it or not: blackout earns its money there. West rooms bake in the evening glare and sheers do the heavy lifting. North rooms live in permanent soft shade. Their daylight is already diffused. South rooms get everything, all day, at full strength. Know your window’s compass point before you shop for its clothes. It takes ten seconds. It changes every choice.

Layer two: task light for reading and dressing
6. Size the bedside lamp with arithmetic, not hope
The bedside lamp fails in two directions: too short, so the bulb glares across the pillow at your partner; too tall, so its light misses the book. The math that prevents both: the bottom of the shade should sit roughly at your chin height when you are sitting up in bed, which for most beds means a lamp whose total height (base plus shade) lands around 24 to 30 inches, standing on a nightstand of 24 to 28 inches. The shade’s job is to hide the bulb from the eyes of the person in the bed, both of them.
If your nightstands are low, buy taller lamps; if the stands are tall, shorter ones. It is the combined height that matters and it is why a lamp that was perfect in the last house can be wrong in this one.
Measure: nightstand height plus lamp height should put the shade’s bottom edge near 40 to 48 inches from the floor for a standard bed. Check yours before the pair is bought.
The pair does not have to match, but the heights do. Mismatched lamps at the same shade height read as collected; matching lamps at different heights read as an error. If one side of the bed is used for reading and the other is not, the lamps may also differ in kind (a directional lamp for the reader, a glow lamp for the sleeper) and the marriage survives it. Symmetry of light matters more than symmetry of objects.

7. Free the nightstand with plug-in sconces
A plug-in wall sconce on each side of the bed gives dedicated reading light with zero nightstand footprint, which in a small room returns two surfaces to books and water glasses. Hardwired versions are cleaner; the plug-in versions hang from a hook or two screws, trail a cord you can cover or run behind the headboard and leave with renters.
Swing-arm models aim the light at the page and away from the sleeping side of the bed, which is the entire diplomacy of shared-bed reading. Buy the pair with independent switches, always. One switch for two readers is an argument scheduled nightly.
Renter-friendly: plug-in models on removable hooks, yes. The cord cover painted the wall’s color is the detail that makes it look installed.

8. Drop pendants beside the bed for the hotel line
Low pendants hanging on each side of the bed are the boutique-hotel signature: they free the nightstand, they draw a vertical line that makes ceilings feel taller and their light pools exactly where a book is. The drop is the craft: the bottom of the pendant should hang roughly 20 to 24 inches above the nightstand’s surface (low enough to feel intimate, high enough to clear a reaching hand and a stack of books).
Pendants are a commitment (they fix the bed’s position on that wall more surely than the bed does), so mock the height with string and the existing shade before anything is wired. In rental and indecision, idea 7 is this idea’s reversible draft.
Needs drilling: yes, ceiling fixings and wiring; this is the layer’s one electrician idea. Budget $100 to $300 the pair, fitted.
The mock-up method, in full: run string from the ceiling fixing point to the intended bottom height, clip the shade or a paper template to it and live with it for two evenings. Reach for the nightstand in the dark. Stack the books you actually stack. Pendants fail on choreography, not looks and choreography can only be tested by living the movements at full scale.

9. Light the dressing zone honestly: vertical light and true color
Faces and clothes are judged where the light is most honest and most bedrooms lie: a single ceiling light behind you puts your face in shadow at the mirror and makes navy read as black in the wardrobe. The fix is light on both sides of the mirror at face height (sconces, a lit mirror, or a lamp beside the dressing table) so the face is lit evenly, front-on.
Color honesty is a bulb spec: a CRI of 90 or above renders colors truthfully, which is what makeup and outfit decisions need. It is printed on better bulbs’ boxes and costs a dollar or two more. The wardrobe interior gets its own small answer: a battery LED strip with a motion sensor, $10 to $15, that lights the rail when the door opens.
Budget: the CRI bulb swap is under $5 a bulb. The mirror sconces are idea 3’s pair, placed with intent.
A caution about mirrors and bulbs together: the fashionable exposed-filament bulb beside a mirror multiplies itself into glare and makes accurate makeup a squinting exercise. Frosted bulbs or shaded sources belong at the mirror, without exception. Save the pretty filaments for the pendant over the dresser, where nobody has to look into them while applying eyeliner at 7am.

10. Give the reader a directional light the sleeper never sees
In a shared bed, the reading lamp’s real specification is not brightness; it is containment. A directional shade, a clip light aimed down at the page, or a sconce with an opaque shade and a tight beam lets one person finish the chapter while the other sleeps in genuine dark. This is the idea that saves the most relationships per dollar on this page.
Test it from the other pillow. Lie there, close your eyes and have the light switched on: if your eyelids register the change, the light is aimed at the room, not the book. Adjust until the sleeper’s side stays dark.
Budget: a good clip or directional lamp runs $20 to $45. Cheaper than the spare room it occasionally replaces.

Layer three: accent light and glow
11. Run a warm strip behind the headboard
An LED strip hidden behind the headboard’s top edge (or behind a floating shelf) throws a halo of warm light up the wall that makes the bed look built-in and the room look expensive, for the price of a pizza. The source must be invisible from everywhere in the room; a strip you can see is a light fitting and a cheap-looking one.
Buy warm white (2700K) and dimmable, with the controller reachable or on the same remote as the lamps. Adhesive backing holds it for a season; a channel or a bead of removable strips holds it for years and comes off cleaner.
Budget: $12 to $25 for the strip that does it. Renter-friendly: with removable mounting, yes.
Placement variants, honestly ranked: behind the headboard’s top edge is the classic and the best. Behind a floating shelf above the bed runs second, with the same halo logic. Along the coving or picture rail it becomes an ambient uplight and belongs to layer one. Under the bed frame it becomes the floating-bed effect, which is idea 15’s night path wearing evening clothes. One strip per room, in one place, chosen well. The glow is a spice.

12. Light one piece of art like the room means it
A picture light over the room’s main art piece (or a small spotlight aimed at it from a shelf) gives the room a focal glow that is not the bed and a bedroom with two focal points, one for day and one for evening, feels designed at night rather than merely dim. Battery picture lights with remotes have made this a ten-minute, no-wiring idea.
Aim accent light at objects, never at circulation space: the glow should land on the art, the plant, the beautiful object and leave the floor path to the bathroom to idea 15.
Budget: battery picture lights run $20 to $40. The art was already on the wall; this is the frame’s lighting budget.

13. Build the candle layer, flameless where sense requires
Candles (real, in hurricanes, away from textiles and out before sleep) or their flameless descendants supply the smallest, warmest points of light in the room and a dark scheme is not finished without them. Group three at different heights on the dresser; put them on a timer and they will be on when the evening needs them, without being lit by anyone.
Real flame near bedding is where this idea ends and sense begins: the dresser and the shelf, yes; the nightstand beside a curtain, no. Flameless has no such geography, which is why it owns the bedside.
Budget: a timer trio runs about $15. This is the cheapest accent in the system.
Placement, mapped once: the dresser gets the trio, at the end away from the mirror’s reflection doubling. A single candle takes the shelf or the windowsill, never the sill behind a curtain. The bathroom run gets one on the counter if the night path needs a destination glow. And the nightstand gets flameless only, on the far side from the bedding, because real flame and sleepy hands keep the hours they keep.

14. Use string lights once, warmly and with restraint
String lights fail by excess: four runs, mixed colors and a cool-white set turn a bedroom into a dorm common room. Used once (a single warm run along the headboard or a shelf edge, bulbs small, color temperature warm), they give a scattered glow nothing else imitates and children and teenagers will vote for them over every other idea on this page combined.
Battery sets with timers are the livable version: on at dusk, off after sleep, no outlet hunt. Keep them out of the bedding itself; the glow belongs on the wall and the shelf, not inside the duvet.
Renter-friendly: completely. This is often the first layer a renter can install and there is no shame in that order.
A word for the grown-up version, since the dorm association scares people off: the difference between festive and designed is density and discipline. Small bulbs, closely spaced, warm color, one single run with clean ends, switched on a timer. That reads as a deliberate glow line. The common failure is volume: three sets, two colors, draped at random heights. One run. Warm. Timed. Done.

15. Light the night path at ankle height
The 3am trip to the bathroom is a lighting problem with a lighting answer: a very low, warm, motion-sensing light along the route (under the bed’s edge, in the hallway socket, on the landing) that comes on at a few lumens and never asks your eyes to fully wake. It is the least decorative idea here and the one guests will thank you for, out loud, at breakfast.
Keep it dim and amber-toned; a bright white night light defeats its purpose by waking the brain it was meant to spare. Under-bed strips on a sensor double as a floating-bed effect in the evening if they are on the accent circuit, which is a bonus, not the point.
Budget: plug-in sensor lights run $8 to $15. Safety equipment that happens to look good.


16. Uplight one plant or corner and give the room a horizon
A small uplight on the floor behind a large plant throws leaf shadows on the wall and ceiling and gives the room a piece of theatre that costs almost nothing; the same trick in an empty corner with a textured object (a basket, a stack of books, a ceramic) gives the room a low horizon of interest away from the bed.
This is the accent layer’s exclamation point and one per room is the dose. Two uplights start a stage production; the bedroom wants a horizon, not a set.
Budget: a can uplight or a small spotlight runs $10 to $20. The plant was already there, under-lit and unbothered.

Bulbs, dimmers and controls: the unglamorous section that runs everything
Every idea above is executed by bulbs and switches, so the rules live in one place. Kelvin: 2700K everywhere, 3000K at the warmest-tolerant edge, nothing above it after dark. CRI: 90 or above where faces and clothes are judged (idea 9), 80-plus is fine elsewhere. Dimmability: buy dimmable bulbs even before you own a dimmer; the fade is the evening’s whole mechanism and a non-dimmable bulb forecloses it for the price of a coffee.
Controls decide whether the system gets used. Every light should be switchable from the bed and from the door, by switch, remote, smart bulb or a lamp’s own inline switch within arm’s reach. A perfect scheme that requires getting up to extinguish will be defeated nightly by the ceiling light, which is by the door and easy. Smart bulbs and plugs are the renter’s control layer and the owner’s cheapest retrofit: scenes (“read”, “evening”, “off”) turn three layers into one tap and timers make the accent layer keep its own hours.
Budget: the full control retrofit for most bedrooms is two smart bulbs and one smart plug, $25 to $40 and it changes the room more than most fixtures do.
Dim-to-warm bulbs deserve their own sentence, because they solve the last temperature problem: a normal dimmable bulb keeps its color as it dims, so a dimmed 3000K bulb is still a cool-ish light. Dim-to-warm bulbs shift toward candlelight (toward 1800 to 2200K) as they dim, exactly as old incandescent bulbs did. In the bedside lamps, where the fade matters most, they are worth their small premium.
Bedroom lighting ideas on a budget: the ladder
The $25 fix: every bulb in the room swapped to 2700K, the ceiling bulb first. The room’s colors, including its paint, become the ones you actually chose. The $75 version: add a thrifted lamp pair with new shades and warm bulbs and kill the ceiling light after 7pm for a week. Most people who do this never go back, which is data. The $200 version: the lamp pair bought new, one plug-in sconce pair or the headboard strip and the smart control layer, at which point the room has three true layers and the ceiling light is a cleaning tool, as it should be.
Notice what the ladder never buys first: a ceiling fixture. It is the most expensive object in the system and the least used once the layers exist. Buy it last, with what the earlier rungs taught you about the room.
One boundary the ladder respects: anything hardwired is an owner’s project or a landlord’s conversation and everything on the ladder is deliberately plug-in. That is not a compromise. Plug-in layers can be arranged, tested and rearranged in an evening, which is how a lighting scheme actually gets tuned to a room. The wired version of a tuned scheme is a luxury; the wired version of an untuned one is just an expensive guess, permanently installed.
Mistakes that make it fall flat
Ranked by how reliably they undo good rooms:
- One cool bulb among the warm. A single 4000K bulb in the ceiling fitting re-lights the whole room wrong every time it is switched on. Consistency of temperature is the system’s foundation.
- The bare bulb at pillow height. A lamp whose bulb is visible from the bed is a glare machine with a shade on it. Shade position is a measurement (idea 6), not a preference.
- Ceiling-only thinking. The room lit from one central point has shadows where life happens and glare where it does not. Layers are the entire subject of this page.
- Brightness as a substitute for placement. A brighter bulb in the wrong place just glares harder. Most “too dark” bedrooms need light somewhere else, not more of it where it is.
- No switch at the bed. A scheme you must stand up to end will be ended by the ceiling switch instead, nightly, forever.
- Accent lights aimed at nothing. Glow that lands on a walkway or an empty wall is decoration spent on the floor. Accent light has targets: art, plants, the headboard wall.
Questions people ask about this
What color light is best for a bedroom? Warm white at 2700K, everywhere in the room. It is the temperature of candlelight and old incandescent bulbs, it flatters skin and warm paint colors and it does not argue with the body’s evening wind-down the way blue-rich light does. If 2700K feels too amber in a very pale, north-facing room, 3000K is the limit; above that, you are lighting an office you sleep in.
How many light sources does a bedroom need? Five is a working answer: a shaded ceiling light for tasks, two bedside sources, one ambient or accent source across the room and one glow (candles, a strip, a picture light). Counted by layers rather than objects, the rule is three heights of light, each switchable. A room can reach it with three objects if one is a pair and one is dimmable.
How can I improve bedroom lighting without rewiring? Almost everything on this page: lamps, plug-in sconces, battery picture lights, LED strips, flameless candles, smart bulbs and plugs for control and sheers to fix the daylight. The entire three-layer system exists in plug-in form. Rewiring buys tidiness (hidden cords, wall switches in perfect places), not better light; the light itself is available tonight.
Where should a bedside lamp be placed? On the nightstand, positioned so the bottom of its shade sits near your chin height when you sit up in bed: in practice, nightstand height plus lamp height putting the shade’s base around 40 to 48 inches from the floor for a standard bed. The bulb must be hidden from both sleepers’ eyes by the shade and the switch must be reachable without sitting up fully.
The bottom line
Bedroom light fails by altitude and temperature, not by budget: it comes from too high, in the wrong color, from one place. Bring it down to sitting height, warm it to 2700K, give it three layers and a switch at the bed and the room you already own becomes the room in the photographs. This week, do the $25 fix: swap every bulb, then spend one evening with the ceiling light off and the lamps on. The room will make its own argument.